Roofing Options

Roofing Options

Since I was a boy, I loved scaling roofs. One of my favourite activities was to climb the big pine tree beside our woodshed. Hop off a big branch onto the woodshed roof, then jump off the other side of the shed (don’t worry it wasn’t that far off the ground).

My boyhood home was a wonderful whimsical place decorated with parts and pieces from old ships. The house itself was shaped much like a boat with many windows, including porthole windows and a big deck on the top. Complete with lights and wind instruments atop a tall pole. The vents, used for the laundry and bathrooms, were like those you would see on an old ship with fins on the top to guide them out of the wind. In fact, most of the pieces (lights, vents, porthole windows, etc.) were taken from decommissioned ships.

There was an exterior staircase leading to the roof. But when my father installed central air conditioning into the house, he located the air conditioner in the middle of that staircase to discourage his two young boys from going on the roof. This, of course, did not work. If anything, it just gave us a challenge and a greater sense of accomplishment when we carefully skirted the air conditioner to our large flat tar coated summit.

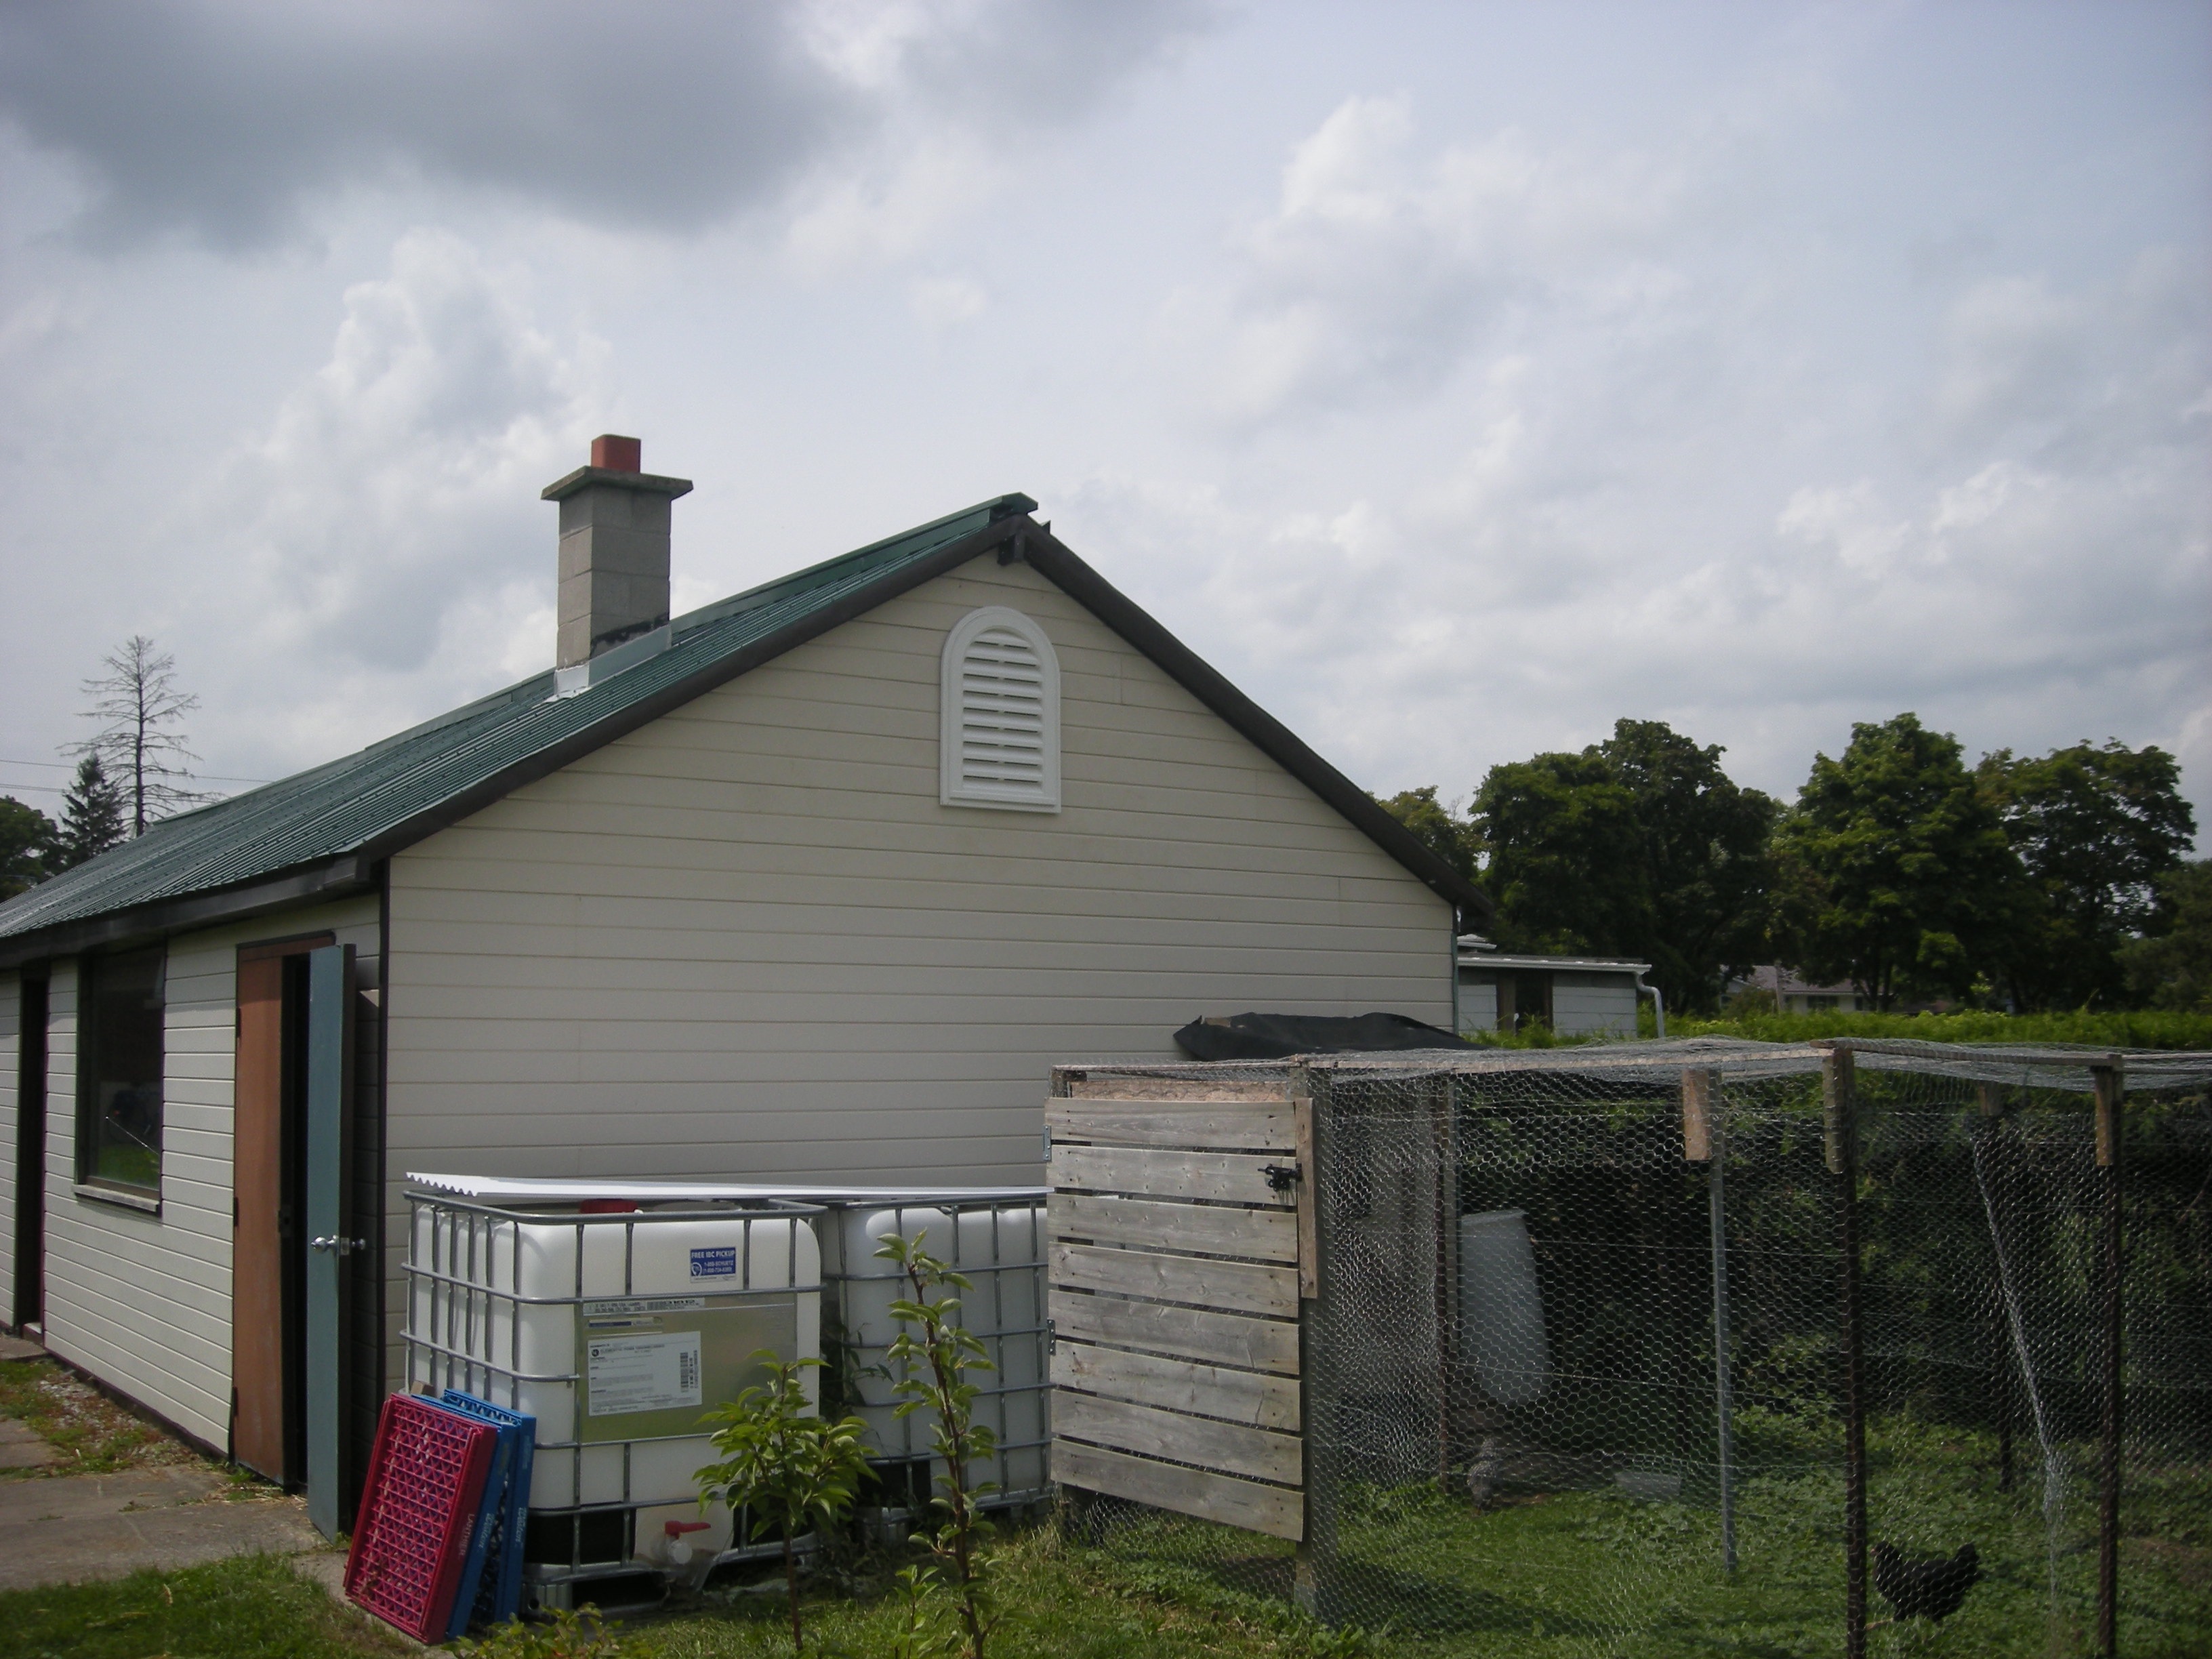
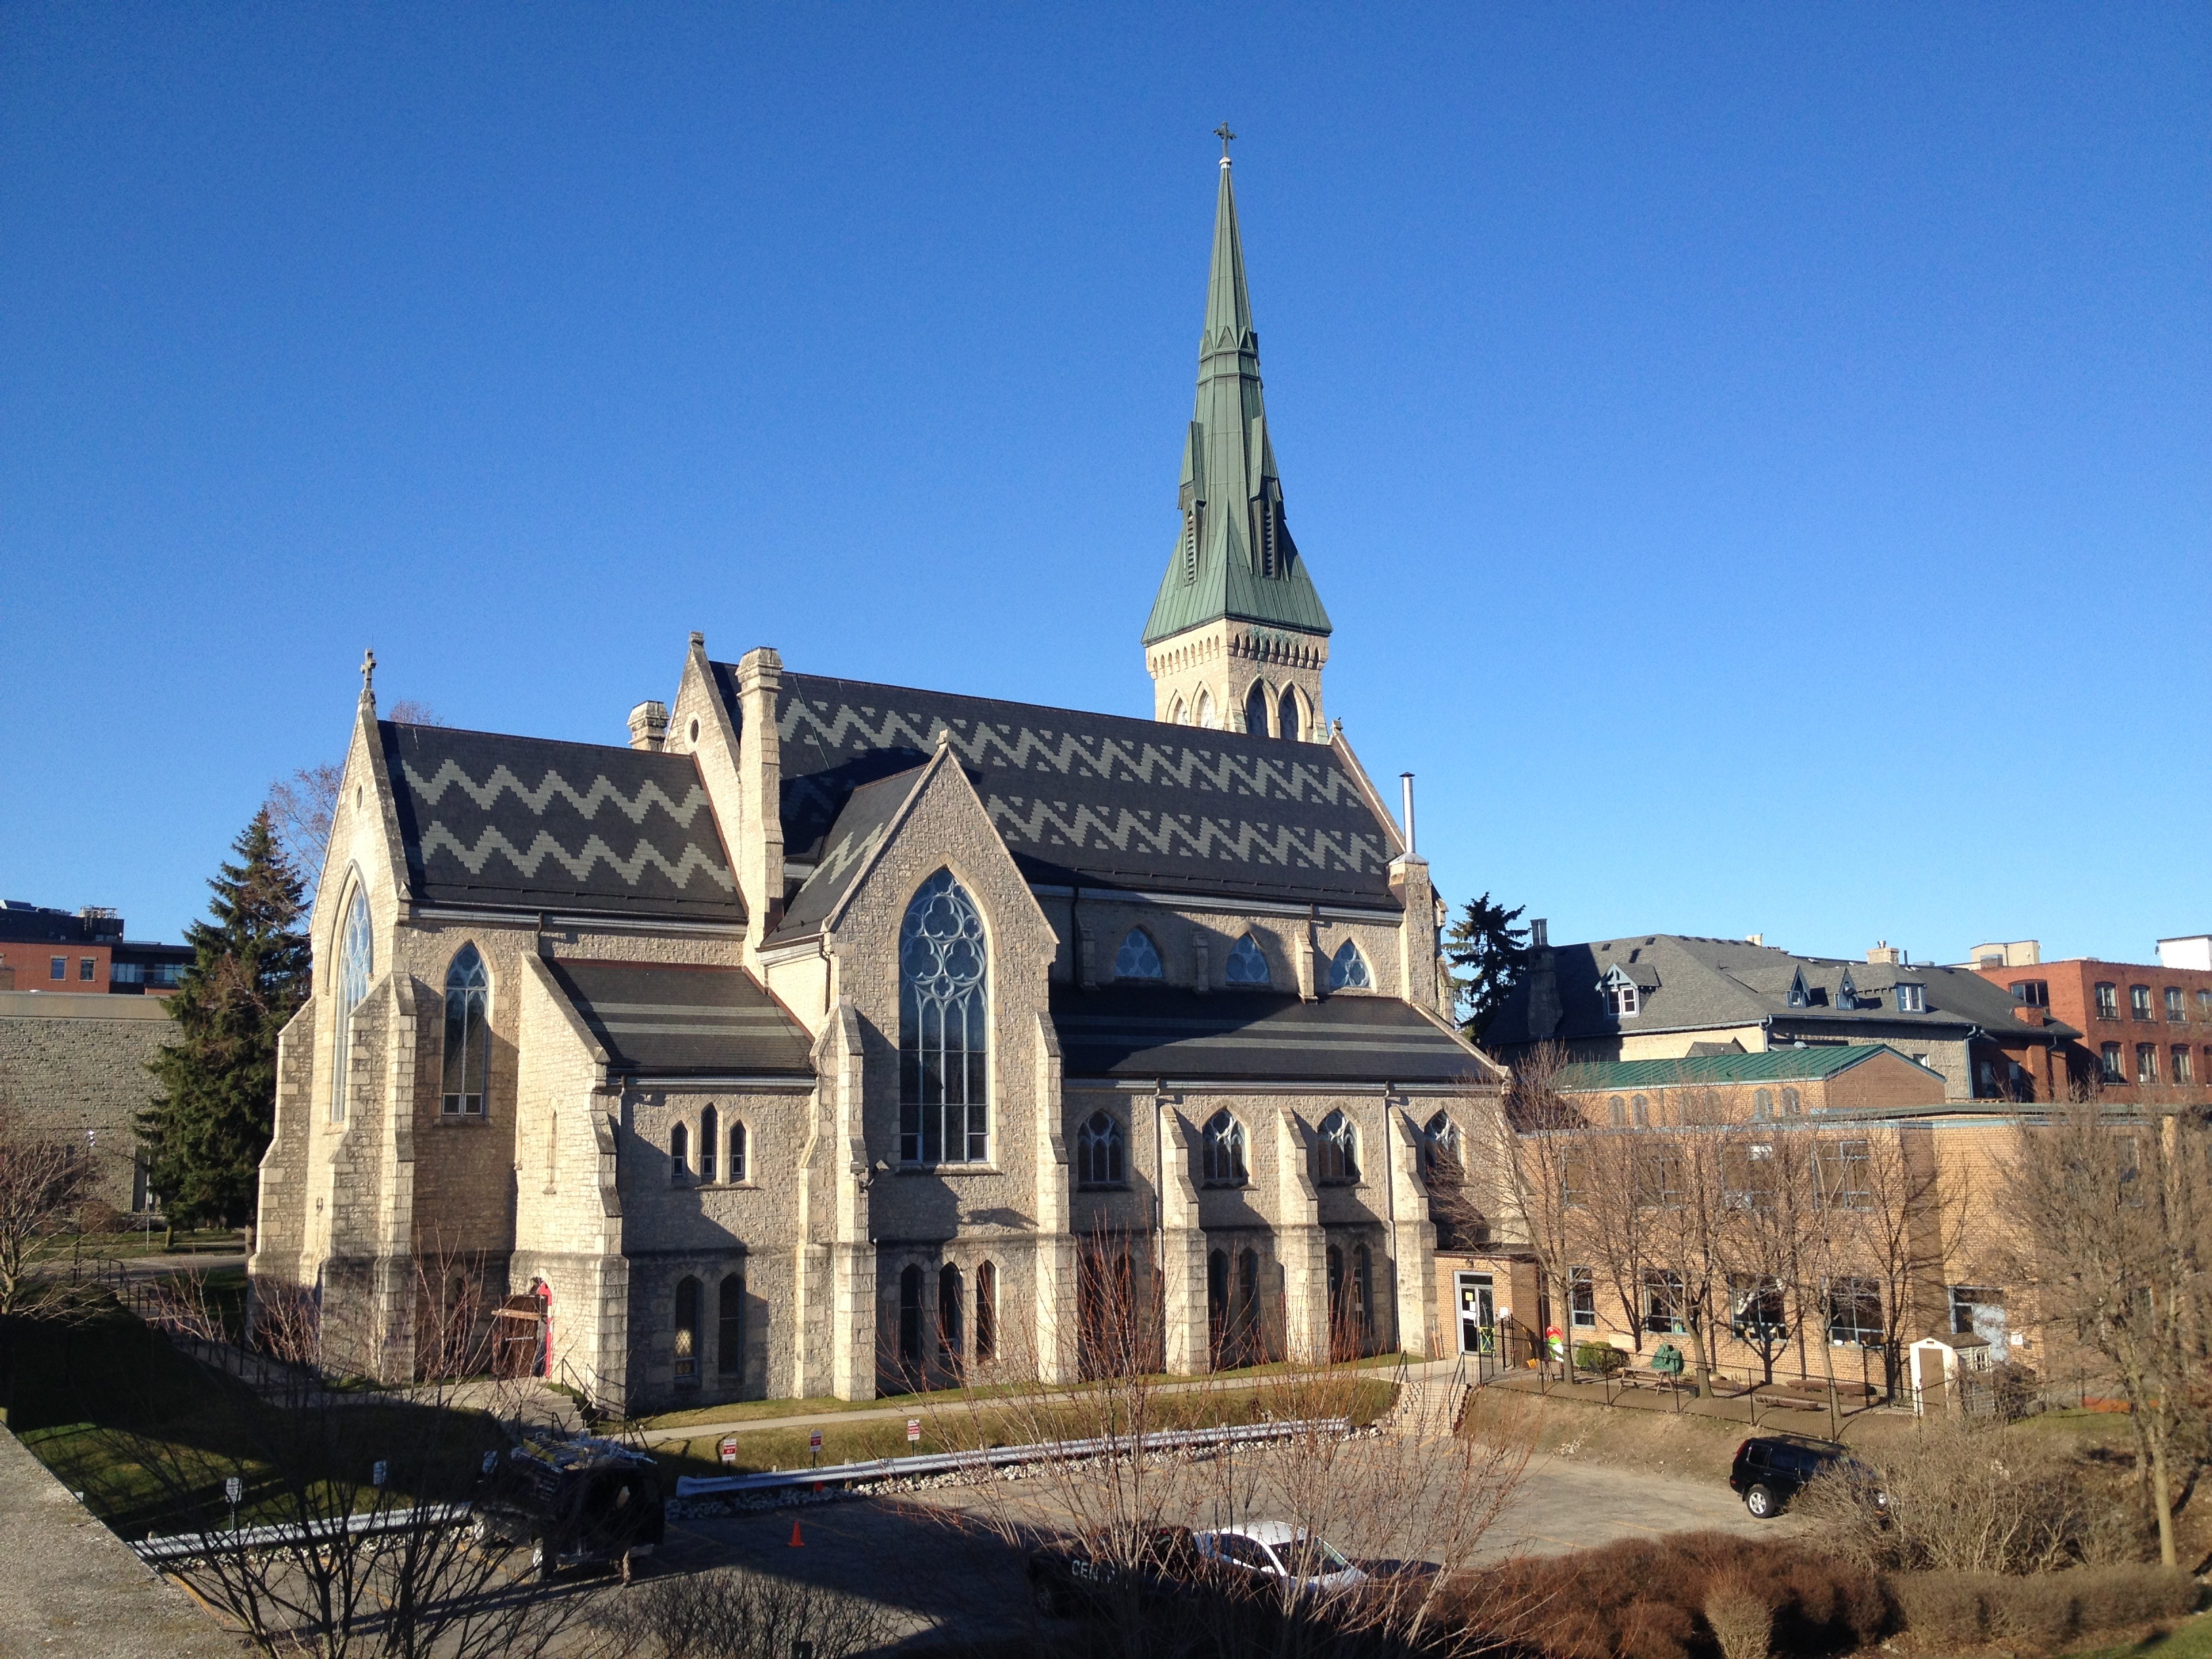
It was like a playground up there. Those big vents I would turn, stick my head in and yell down into them. Watched the wind turbine spin around endlessly. One can understand why when it came to replacing the roofs here at the Shagbark Homestead, on the house and outbuildings, I was keen to do them myself. Fortunately, none of them are over one story and the pitches are all pretty reasonable.

This blog post relates only to the different options for roofing whether you are going to hire installers or do it yourself. It is not a DIY post.

Being a gardener and concerned about the state of our environment, I wasn’t about to just slap asphalt shingles on like most people would do. Instead, I spent quite a bit of time investigating the different roofing options available. To begin, I will touch on why I don’t like asphalt.

IMG_1431

Asphalt shingles can be summed up in two words: cheep and dirty. They are by far the cheapest roofing option and in my opinion the worst. Because they don’t last very long and are almost completely non-recyclable. Municipal waste departments all over the world are plagued with the problem of dealing with the enormous amount of waste created by asphalt shingles. They also add a small amount of toxic chemicals to the rainwater taken off roofs with asphalt shingles making it unsuitable for use watering vegetable gardens. I don’t like asphalt roofs and I hope that you don’t decide to put an asphalt roof on your house. But if you do, I recommend using shingles that are based with fibreglass cloth as they will at least last longer for minimal increased cost over paper based ‘three tab’ shingles. Three tab shingles are just garbage and shouldn’t even exist.

There are other types of shingles out there that are supposed to be biodegradable. I have heard of some made out of hemp fibre and some sort of organic tar compound that look similar to asphalt shingles. I don’t know that much about these type of shingles. When I looked into them, they seemed quite expensive and since they are a very new product the promised longevity is questionable. If you have any experience with them, I would appreciate a comment below.

Steel! Steel is my number one recommended roofing option. Steel just sounds cool, like heavy metal or Superman, the man of steel. I would choose Superman over Oscar the Grouch to protect my house and garage from the rain and snow.

tin roof

Steel is more expensive than asphalt shingles but with a much longer life span. Steel is good for rainwater collection, fire proof and best of all very recyclable. You will get money for a worn out old tin roof. Instead of being turned away from some waste dumps. There are many options when it comes to steel roofing all with different prices and advantages.

Painted tin sheet metal is most common and the most affordable steel roof. It won’t last as long as galvanized and has the added expense of strapping. Sheet metal roofs can go over an existing asphalt roof, which saves our municipal waste departments stress and has the added advantage of some sound dampening and protection if a small amount of water gets underneath. Sheet metal comes in a number of different profiles appropriate for almost any roof with a slope. There are also some patterned options with added expense and no increased advantage other than ascetics. But hey, steel roofs last for a long time, it’s important to be happy with the look of your roof.

IMG_1432

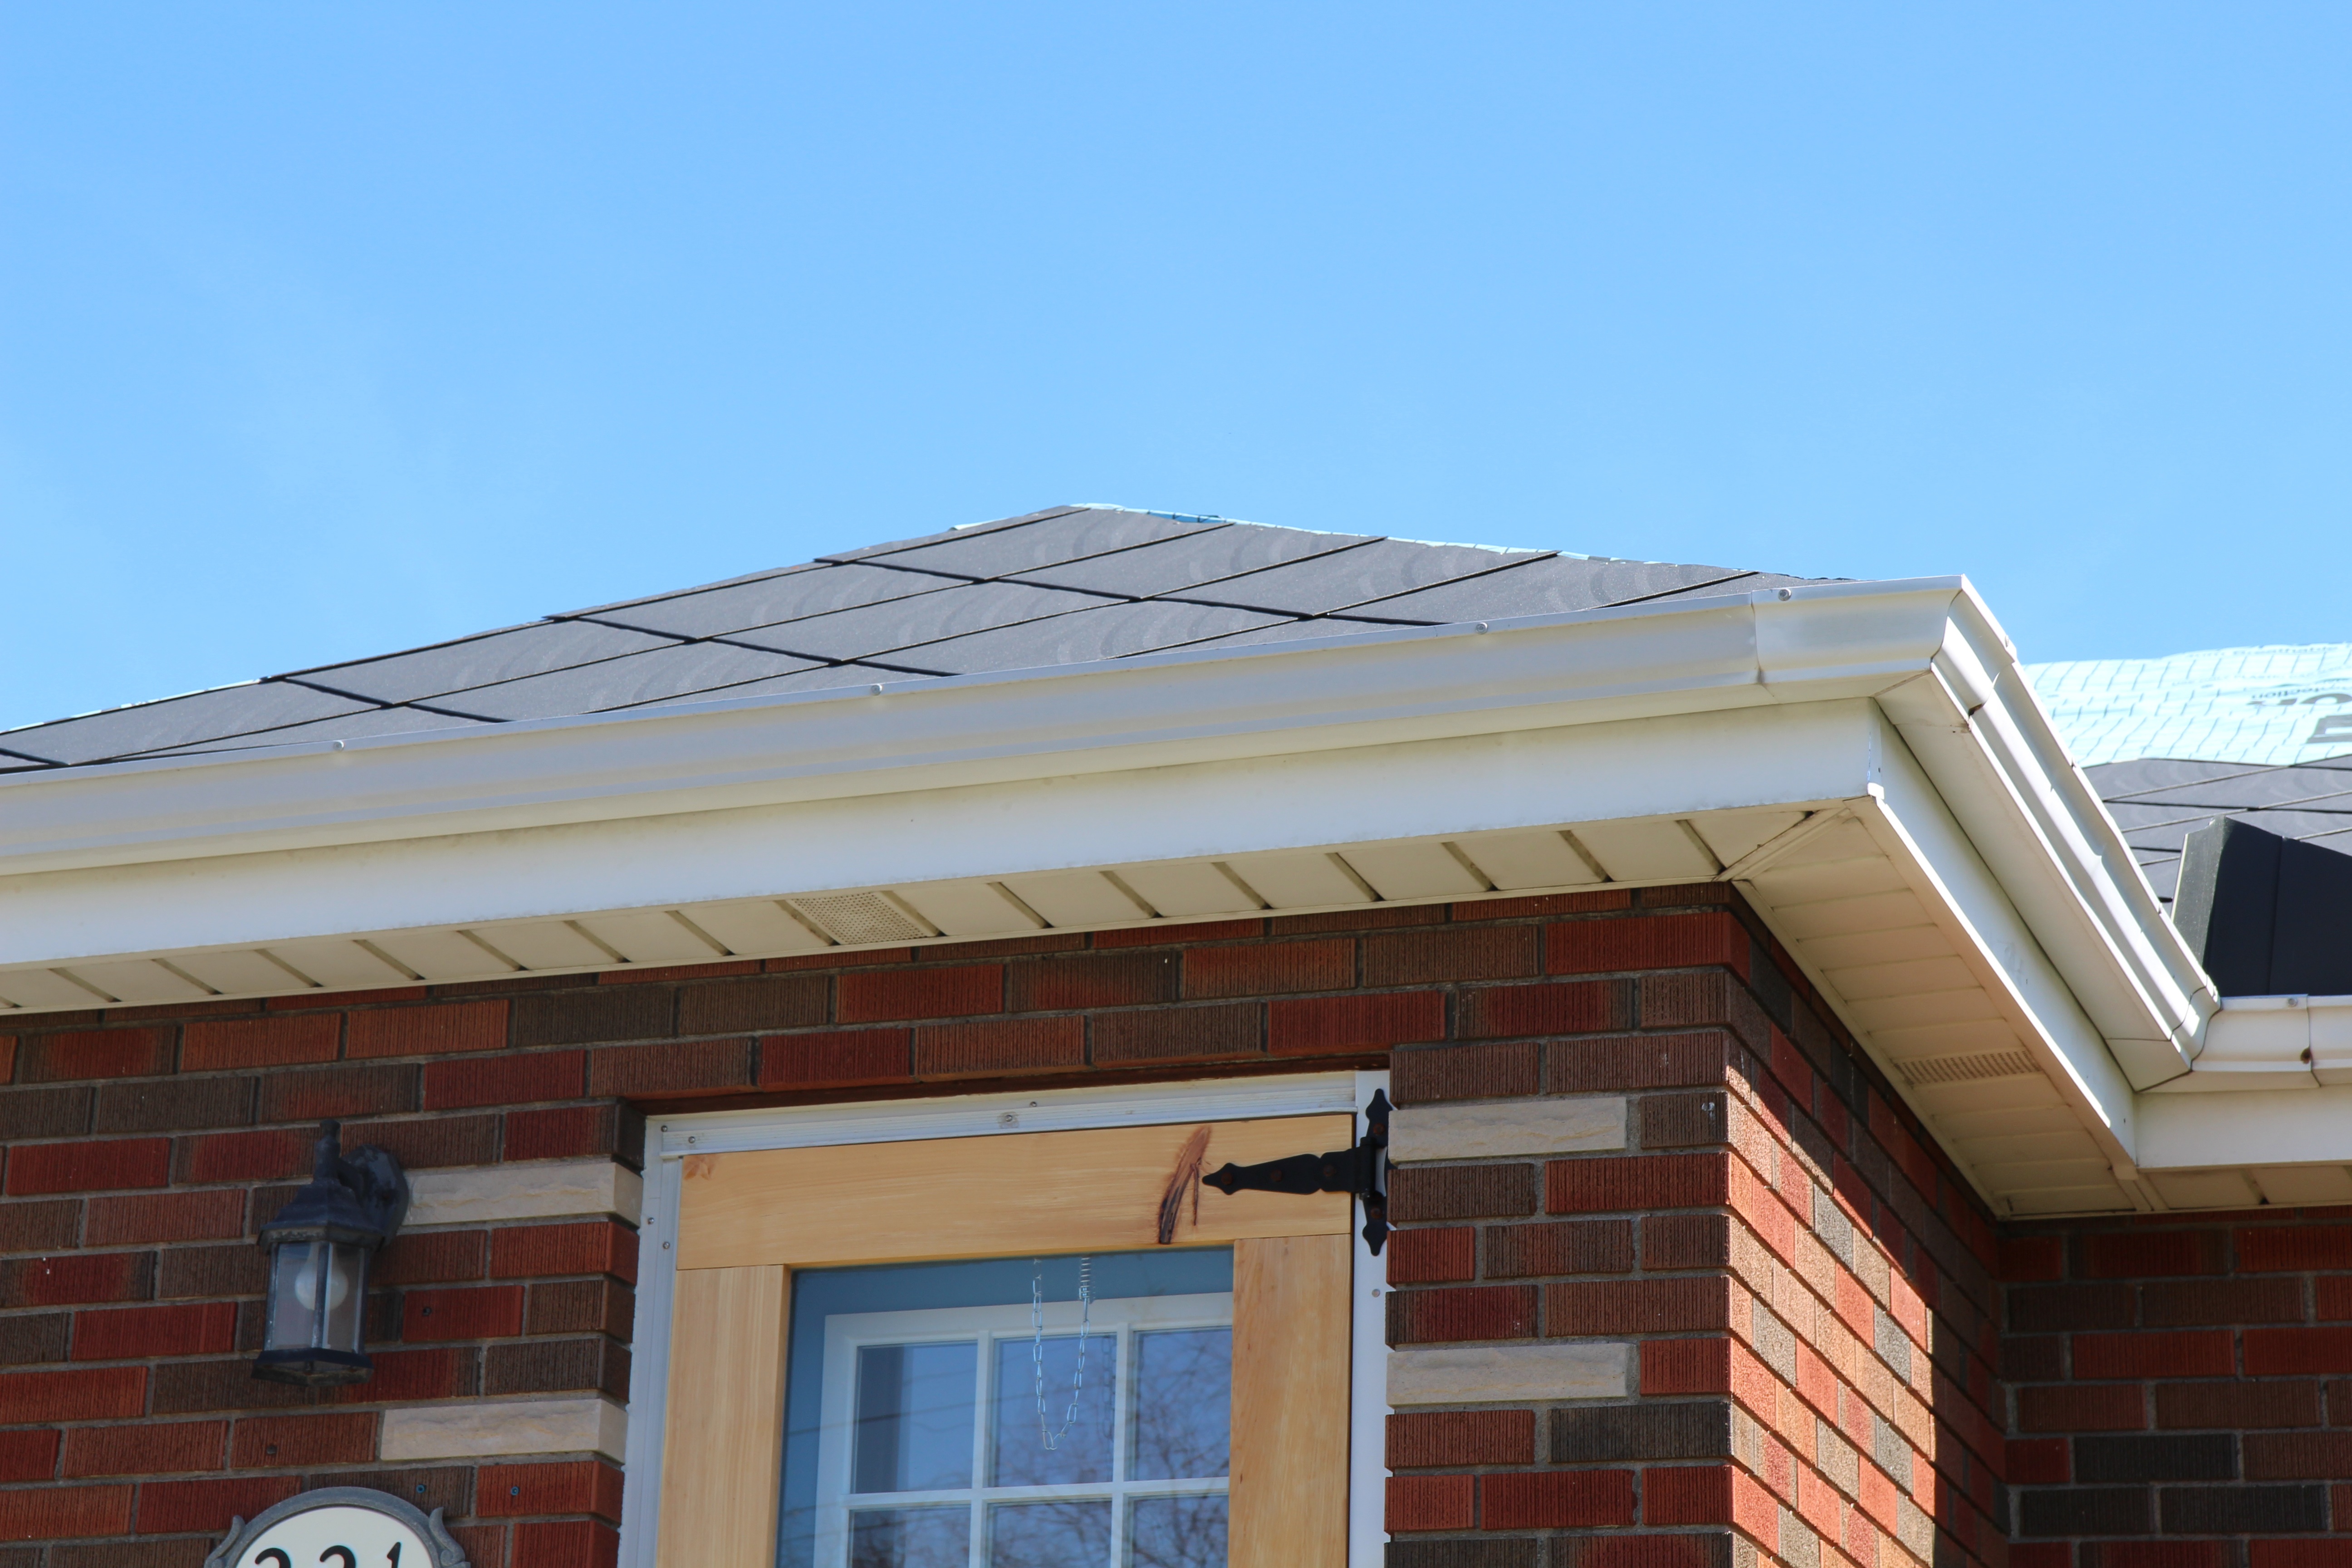
Steel shingles are a more visually attractive option to steel sheet metal. Available in an overwhelming myriad of styles and colours. Some of which look convincingly like slate, clay tile or cedar shingles. They are usually made of galvanized steel and as such, are more expensive and longer lasting than painted tin sheet metal. However, they don’t require strapping which saves that expense and like sheet metal can go over an existing asphalt shingle roof.

I love steel roofs but they aren’t perfect. They do have their disadvantages, they can be challenging to walk on. In cold climates, they need snow shields to prevent snow slides (which don’t always work). They are noisy even with an asphalt roof underneath and an insulated attic, a heavy rain is a lot more irritating on a metal roof versus other options.

Other metal roofs like aluminum and copper are great and have all the same advantages (and disadvantages) of steel. Even longer lasting and are more recyclable than steel. They are also, not surprisingly, more expensive. If it is important to pass along a house with a long lasting roof to your grandchildren or you can get aluminum on a good sale, then by all means go for it.

st georges church

Slate is not a roofing option most people consider, it is usually only seen on churches and stately old mansions. There is good reason for this. As slate is by far the most expensive type of roof. It is really complicated to install and must be done by experienced professionals. You would be taking your life in your hands to try and walk on a slate roof with any kind of moisture on it. This isn’t really an option for most homeowners. However, it is a completely natural material and will last more than a lifetime. It is literally the top choice of roofing.

cedar shingle roof

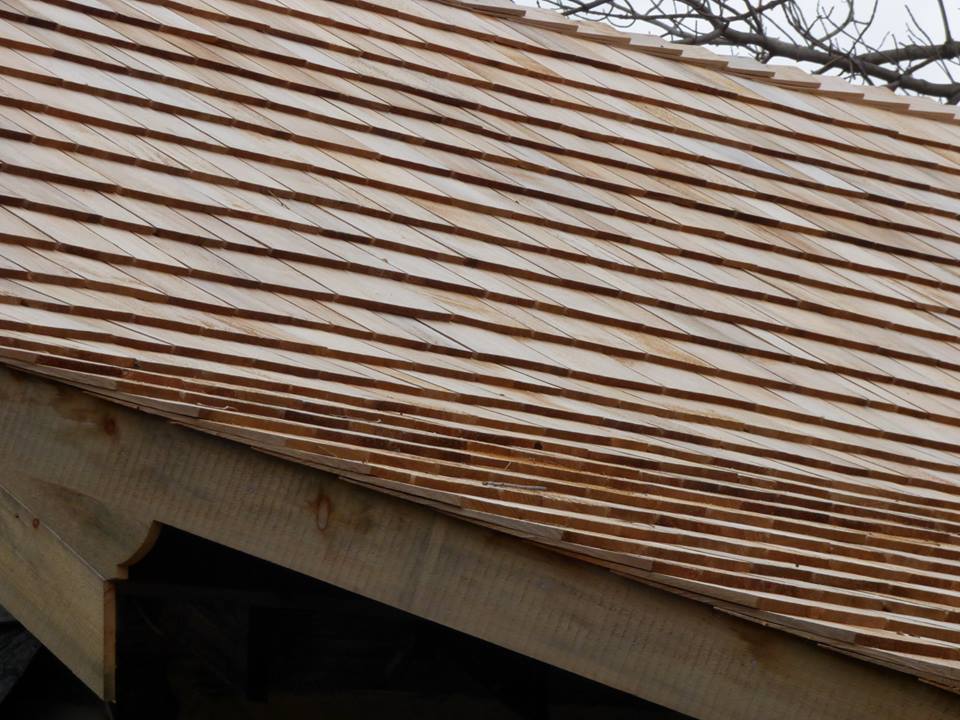
Cedar shingles make for beautiful roofs. I seriously considered putting a cedar shingle roof on my house until I read about all of the disadvantages of modern cedar shingles. There is still a common myth that cedar shingles roofs will last for 40 years. As this was true when most cedar shingles came from old growth western red cedars. These are very difficult to find now and we need to leave the few remaining old growth cedars alone on the West Coast. Most cedar shingles available on the market are from younger trees and you will be lucky if they last longer than asphalt shingles. They can be quite costly especially if you are hiring installers. A cedar roof in the middle of a hot dry summer is also a bit of a fire hazard. But they look beautiful and are a natural biodegradable material.  I still don’t recommend them for roofs but work well as siding, where they will last quite a long time with some maintenance.

Clay tile is a very good roofing option if you live somewhere in the world where the temperature usually stays above zero celsius. I live in cold Canada where one winter would destroy a clay tile roof. In warm climates clay roofs are very long lasting. They make for very beautiful roofs. Tile roofs are on the pricey side but not unaffordable (like slate) for a more than common home.

Flat roofs, like the one of my childhood home are problematic. If you live in a house with a flat roof, move! Or if that isn’t an option, I would recommend putting a trussed roof over the flat roof. If the flat roof must stay. There is only one option, some kind of membrane. These are usually asphalt based, some have a tar and gravel cover and some are synthetic. I would recommend hiring an installer for a flat roof as there is some liability there. However, if there is even the slightest pitch (or you can add one), you can probably get away with a high profile sheet metal roof.

Good luck with your decision making and keep your head dry.

Chicken Tractor Modifications

Chicken Tractor Modifications

Chicken tractor? You might be thinking to yourself. Maybe you have an image of a chicken driving a tractor or a tractor powered by chickens?

chicken tractor

The latter is kind of the case. No diesel required.

It is a mobile coop and run combined. The idea is that you can move it daily (or as often as you like) and the chickens will trim the grass and fertilize the ground at the same time!

My chicken tractor is one that someone was throwing out and wasn’t very well constructed in the first place. I had to replace all of the wire. Plus I lengthened it and custom built proper nesting boxes on the back. It ended up taking me so long, that I probably would have saved some time to just let it get tossed and build something from scratch.

However, the material was still almost brand new, so, I am happy to have saved that. As well, it gives me a good idea of how to build my next one when this one rots out in a few years.

There are a lot of different designs for chicken tractors out there. They are a bit easier to design and work better with meat birds vs. laying hens. As hens need nesting boxes and a proper place to sleep. There are lots of good designs for chicken tractors for meat birds, but none that I am too keen on for laying hens. They are either too heavy or too small or overly complicated to build or a combination.

I am working on a improved design in my head for a tractor that is suitable for 7-8 hens and light enough to easily move with one person.

This one pictured is a common A-frame type tractor with a protected loft area for the hens to perch, nest and hang the feeder and a more spacious open floored area below for them to scratch. The floor in the loft is just hardware cloth on the cross supports. This may seem cruel, but the hens don’t seem to mind and they are mostly on the grass anyway. The mesh allows their poop to fall on the ground, making the chickens very little work in the warmer months. This type of coop isn’t suitable for year round use in this part of Canada anyway.

I originally used a 1/2 inch hardware cloth for the floor. Thinking that this would be nicer for the hens to walk on. It may have been, but the holes in the mesh weren’t large enough for their poop to fall through all the time. The area where they were sleeping was getting totally clogged and gross with chicken poop.

DSCN9804

This was no good and I couldn’t repair it with the hens in there. So, we just dealt with it for a few months and I changed the floor to a 1 inch hardware cloth (same as I used on the sides) and this works great.

DSCN9805

Here’s the new cloth installed.

DSCN9807

And this is the floor after a few weeks use. The Plymouth Barred Rock doesn’t seem to mind the floor and no poop clogging the holes!

The other issue I had with my design is that I made the doors on the side open up. My thoughts were that this would be easier to keep the hens from trying to hop out when refilling the feeder, etc. However, in reality, the hens were always kind of surprised to see me and not really interested in trying to escape. This also meant that I had to hold the door open with my head, which wasn’t very comfortable.

In most A-frame designs I had seen, the doors folded down and I understood why. So, I changed mine to fold down and it is so much better.

DSCN9806

Subaru Head Gasket Replacement EJ25 SOHC

Subaru Head Gasket Replacement EJ25 SOHC

Ah the boxer’s achilles heal. Such a strong and reliable engine, until one day you see little droplets of fluid on the ground. You think, oil? Then when you look underneath the car, you see that it is coolant. A little coolant leak isn’t usually a big deal on most cars. Usually just a worn out hose. However, when that coolant is dripping out of the head, it is a bit more of an involved repair. Particularly on a flat engine.

Make very sure that you correctly diagnose a head gasket leak if you suspect one. Getting a mechanic to verify it can be worth the extra few bucks if you aren’t 100%. As a water pump (which is quite close to the head) could be leaking coolant and appear to be a head gasket leak.

The 2.5l 4 cyl SOHC boxer engines made between ’98 and ’04 are known as being the most problematic for head gasket failure. I have also heard of a lot of cases in the DOHC naturally aspirated and turbo charged engines HG failing and the 2.0l and newer models too. I haven’t heard as much about problems with the H6 engines. The leak usually starts on the left side (drivers side in North America) of the engine.

Unfortunately, I didn’t take a picture of mine when it was leaking to show you what it can look like. You will need to take the splash guard off the bottom of the car to get a clear view. It will appear like some droplets of coolant (or oil) along the line where the head meets the block. Make sure that it isn’t running down the engine from somewhere else. Though it is also possible to have more than one leak (my car had a few). It was a bit like a sick person leaking fluids from different parts of their body.

It is possible to change the head gaskets with the engine in the car and there are a few blogs and videos out there about how to do that. I believe the Haynes Repair Manual also explains that procedure. However, I didn’t do that. There are a lot of reasons I would recommend taking the engine out for this repair. Number one is room, there isn’t much room in that engine bay to remove heads or get a torque wrench in to torque the heads down properly. It will also be a pain in the ass (or more specifically the back) to clean up the engine block .

Pulling the engine seems like a daunting task to anyone who hasn’t done it before (myself included). But it isn’t that bad and will save a lot of time and stress to your back. It is also pretty fun seeing the engine flying out of the car on a hoist. This blog is going to explain the head gasket change with the engine out of the car.

Enough with the introductions. Let’s get your tools ready.

For this job, you will need a lot of them:

IMG_0312

3/8″ and 1/2″ ratchets, with lots of metric sockets 8,10,12,17,19,22, pretty much a full set, most of the same sizes of wrenches and lots of different sizes of extensions. Plus a breaker bar with an extra long pipe (the one from your jack will work great) for extra leverage. Lot’s of little stuff, different types of pliers (the long bent ones are super handy), a big phillips screwdriver, different sizes of flat heads, a strap or chain wrench, vice grips, a vice is handy too, pry bars, a ball pein hammer.

IMG_0107

A cordless impact wrench or air and an air ratchet, will make things go a lot faster.

IMG_0311

Don’t forget the big stuff: jack and jack stands, engine hoist with chains or a leveller, and an engine stand.

The first part of this repair begins the same as my previous post on how to change a timing belt:

https://shagbarkblog.wordpress.com/2015/02/12/how-to-set-timing-on-a-subaru-sohc-ej25/

Except that you stop after you get the drive belts off. But before you disconnect the battery, relieve the fuel pressure by pulling the relay, it is under the steering wheel. The Haynes repair manual describes where to find this. But you will need to take plastic trim off, two plastic body bolts on the door edge of the panel. One metal screw under the steering wheel and pry a few clips off where it meets the other part of the dash and it is off.

Also disconnect the positive terminal of the battery. Then unbolt the bracket that holds the battery in place and remove the battery.

I removed the hood for this job. But I wouldn’t recommend doing that. Instead, I would recommend opening it all the way and attaching it to the ceiling of your garage with some rope, wire or straps. As re-attaching the hood is a pain and it is nice to be able to hang a trouble light off of it while your are working.

Remove the washer fluid bottle. It is just two bolts on the top of the bottle, then pull the plugs to the pumps and the hoses. It is a good idea to drain the bottle first if you can. Otherwise, fluid will start to leak out of the pumps once you pull the hoses. If you quickly pull the bottle out once it is free and tilt is back a bit, that will stop fluid from leaking out and you can just pour off the excess fluid out the top.

The next step is to unbolt and unplug the alternator from the a/c compressor.

Unbolt the tensioner bracket with the power steering pump together. Remove the bolts that attach the power steering line to the shield on the right side of the intake manifold.

Remove the resonator (black plastic thing) on the right side of the car. You can just flop the power steering pump over into that spot with the lines still attached.

You can do the same thing with the a/c compressor. Remove the bolts attaching it to the block and flop it over into the spot where the battery sat. You might need to remove the throttle cables first.

DSCN9769

To remove the throttle cables, loosen the bolts further from you in this picture all the way off. Then slide the cables back and up and out of the brackets. Don’t worry too much about getting them back into the same spot if they are old like mine, they will be pretty well marked with rust.

DSCN9770

To remove the wires out of the throttle body, push each pin out of the side, then follow with the wire. Once the cables are free, move them out of the way. First make sure to label which goes where.

DSCN9771

Pull off the brake booster hose and the two fuel lines and the vacuum line beside it. Make sure to label their order.

DSCN9774

Loosen the hose clamps and pop off the two coolant lines below that run to your heater core. Also remove the air box bracket at the back of the picture. It is attached by two bolts on the transmission. It may be easier to access them underneath the car.

DSCN9772

Unplug all of these six connecters and remove the other air box bracket. You will want to bolt the lower part of that bracket back on the block if you choose to use the loop on it to lift the engine out.

Remove the starter motor (sorry didn’t get a great picture), it is probably the easiest one I have ever removed. It is located on the top left side of the transmission. Just unplug/unbolt the two connecters, then unbolt the one nut and the other bolt. That’s it, the starter should now be free to remove and trade with your friends. There is a little bracket with a couple of grounds attached to it, that you will be removing at the same time. Make sure to label it well, so, you remember where it goes.

I think that is about everything on the top, you will need to unbolt the exhaust manifolds underneath the car. You can just leave them hanging. You might also want to drain the oil at this point.

Unless, I am forgetting something, your engine should be free to unbolt from the transmission. If your car has an automatic tranny, you will need to unbolt the drive plate. There is a little rubber cover on the back top right of the engine. Pop that off and rotate the engine around to find and unbolt the attaching bolts. I think that there are eight.

Unbolt the big support that comes down from the firewall to the transmission on the transmission side. Then get your floor jack under the transmission to support it.

Next, get your hoist out and chained onto the engine. I used the lifting loop on the back and one of the a/c compressor bolts with a washer. Don’t put any tension on the chain yet, just have it ready to support the engine.

DSCN9780

Remove the nuts and bolts attaching the engine to the transmission. I recall there to be 4 nuts and 4 bolts, including the two that held the starter on. Leaving three of each remaining. I found all of these easier to access from above.

Once those are out, remove the two nuts holding the engine mounts on the cross member.

Double check that there isn’t anything attached between the engine and the car.

Now the fun begins, start to jack up your hoist until the engine mounts are free from the cross member. Then jack up the floor jack so, it is supporting your transmission.

Now you need to separate the engine from the transmission. If you are lucky, you can shake it bit, side to side and it will start to slide out. Doubtful that will be the case, you will probably need to pry it a little bit. Make sure that the engine hoist and floor jack are evenly supporting the engine and transmission respectively.

I just used a long handled pry bar to coax the two apart from each other. Just be careful if you do the same not to damage the engine or transmission. As they are both made out of aluminum, the metal is very soft and easy to gouge.

Once it starts to slide out, you should be able to pull it the rest of the way by forcing the engine towards the front of the car with your hands. I managed to do this by myself. But if you can get help with this, it will be a lot easier.

When it is off the transmission, jack it way up in the air to clear the front of your car and roll the hoist back. Congratulations, you got the engine out of your car!

IMG_0096


Time to take a break and celebrate.

DSCN9782

After that, the next step is to remove the clutch and flywheel or the drive wheel from the back of the engine. Then get your engine set up on an engine stand and off the hoist.

Notice the paint sprayed across my old pressure plate. The surprises you find when working on a car. This is confirmation that the engine was swapped in my car.

Remove the spark plug wires, if you haven’t already. Make sure to twist side to side until they release easily from the spark plugs.

Next, remove the intake manifold. First the EGR pipe needs to come off, you will need a 22mm wrench for that. Then there are a bunch of 14mm bolts on the two shields and each side of the intake itself. There will be a couple of plugs underneath the intake and two small coolant lines that will need to be detached. Then you can pop the whole thing off as a unit.

Remove the little 10mm bolt and pull out the dipstick. It may take a little wiggling side to side to get it loose. Be patient, you don’t want to bend it. Make sure that you have drained the oil before you do this.

Then unbolt the main coolant line off the top of the block. You can leave the other black line attached. You can leave the main one too, but it is a good idea to replace the o-rings on it.

If you are removing the harmonic balancer by hand, it would have been a good idea to do that in the car. As you can leave the car in gear to put some resistance against you. But if you are using a heavy duty impact wrench, it will be no worries now that the engine is out.

Then remove all of the little bolts holding the timing belt covers on and remove the timing belt as described in the previous article.

Now you should be ready to get the heads off.

First remove the valve covers.

DSCN9795

Cool check that out.

Two on each side (painted orange in this case) with the letter ‘s’ on them and two in the middle (no s). It is recommended to replace your head bolts when doing a head gasket. But if you are going to reuse your bolts, make sure that you keep them in order.

It is going to take a lot of gusto to get these bolts loose. So, get out your breaker bar with the long extension on it and your 12 point 14mm socket and get ready to sweat and swear. Careful to make sure the head is supported before you pull all of the bolts out.

Once your heads are off, remove the camshaft sprockets, plastic cover, and camshaft position sensor before sending them off to a machine shop to get them milled. It is a good idea to get the shop to replace the valve stem gaskets, camshaft oil seal and plug at the same time. It didn’t cost me much more at all, I think $40 for both heads. I supplied the gaskets which came in the Fel-Pro MLS head gasket kit I bought.

IMG_0314

It is interesting to examine the old gaskets. The one on the left is from the head that was fine and the one on the right is the head that was leaking. Notice how badly that gasket had deteriorated. It was starting to leave little puddles everywhere I went.

IMG_0064

If you have a manual transmission in your car, it is a good idea to get the flywheel machined at the same time as the heads. Ohhh shiny.

Also, examine your clutch plate and pressure plate. If either or both are worn at all. Install a new clutch kit. It will be a heck of a lot easier now.

DSCN9787

As you can see, mine were both very worn. There wasn’t much material left on the clutch plate and that ring on the pressure plate is a sign of severe wear. There were also some bent fingers.

DSCN9799

Also, check for evidence of oil leaks front the back of the engine. It is a good idea to reseal the aluminum plate on the back of the engine (right side of the picture). Careful not to strip the screws when taking them out. If your rear main oil seal doesn’t have any evidence of leaking, it is probably okay to leave in. It is not the easiest thing to replace and I am told they aren’t prone to failure.

Though, with that said. Mine was leaking. But I think that might be because the engine was probably sitting for a long time unused.

The next thing to do is prep your engine block. First scrape away any old gasket material, careful not to gouge the surface, again this is aluminum. Then use coarse emery cloth and a block to get the surface nice and clean and ready for your new head gaskets.

DSCN9797

This is a good chance to clean up the heads of your pistons. Just rotate the crankshaft to get each head up to TDC to avoid getting crap in the piston chamber. Then carefully scrape off the carbon and wire brush them clean.

IMG_0715

That’s better.

Now it is time to put the new head gaskets and heads on the block. I recommend using a multi-layer steel (MLS) type of head gasket. They aren’t cheep, but they should last as long as your car does. Fel-pro makes a set, they brand Permatorque. But they also make some cheeper quality single layer ones, so make sure you get the right one. Six Star also makes them. But I wasn’t able to find them in Canada. An OEM Subaru HG set will be good quality but the HG are prone to failure after 160k as we know. Cobb also makes really good quality ones but only for the DOHC turbo charged engines.

IMG_0063

Check out the pretty periwinkle blue colour Fel-Pro chose for these gaskets.

Once the new HG and head are on. Lightly oil (with clean oil) and hand tighten all the bolts on with the 4 ‘S’ marked bolts on the sides.

The tightening order for this engine is complicated. Your repair manual should explain it in detail. There is also a good video on briansmobile1 on Youtube that explains it.

The rest of the installation is basically the reverse of the removal.

IMG_0315

It is recommended to use Subaru coolant and Subaru Cooling System Conditioner. They are supposed to last longer and have less likelihood of future leaks. It didn’t cost much more than any other quality coolant.

IMG_0095

Careful when re-installing the engine not to drop it on your head.

Also, it is key to get the engine and transmission at just the right angle and level to each other. They should basically slide back together. If the engine seems to be resisting a lot. It probably isn’t at the right angle. Take your time and don’t rush this part of the job. It is great it you can get someone to help you.

Good luck and feel free to ask me any questions in the comment section.

Why I love buying things from classifieds

Why I love buying things from classifieds

For most people, it is the deals. But not for me. No, it isn’t my favourite part of shopping the classifieds.

Yes, I do like getting deals, just like anyone else. Though, anyone I know who has made many purchases from classifieds will tell you, sometimes you buy stuff that’s junk and you might have been better off buying new. Or end up throwing whatever it is out and buying something new instead. I know that I have been guilty of that before.

So, the deals can be hit and miss. You can also spend a lot of time on emails co-ordinating a meeting, then time driving to go and view it. That could be important, depending how much you value your time. You could save a lot of time buying something from a store or ordering something online that arrives at your door in a few days.

What is it then that I love so much about wasting my time driving long distances and buying junk? Good question.

It is the people that I meet. The little snippet of their story that I get from that brief meeting and exchange.

For example, just this past Friday, I went to Strathroy, Ontario to buy some pink springs and shocks for my Outback. It was kind of a long way to go, but the price was good and more importantly they were the type of suspension that I wanted to switch my car over to. But the more interesting part of the story was why the guy was selling perfectly good suspension for next to nothing. Did he upgrade the suspension on his Subaru? No, but sort of. He had a kit car he was building, which is supposed to use most of the running gear off of a Subaru WRX. But after he bought a perfectly good ’04 WRX wagon (for $3 grand! why didn’t I find that deal?). Then proceeded to completely take the car apart and assemble his kit car. He decided that he wanted to upgrade some things. In fact, almost everything except for the drivetrain and wheels (which I tried to convince him to sell me).

The idea of the kit car is that the company in Boston makes the chassis, body panels, glass and a few other things. You order that (or pick it up) with the instructions. Then buy a Subaru WRX and will be able to pull the rest of the parts you need to make a functioning car out of the two. The result is supposed to be a mid-engine two seat rear wheel drive convertible. Kind of like the last generation of Toyota MR2. It was a pretty cool project, I was happy he decided to upgrade so many parts. Granting me the fortune to meet him and chat about his project car.

I had another interesting experience in August last year. When I went to London, Ontario to look at an ’02 Audi A4 Avant. I decided to buy the car, which turned out to be crap. But that’s an old story, me buying crap cars. The more interesting part of the story is the man who was selling the car. As he was a bit of a VW diesel nut and had a crazy modified Jetta TDI. It wasn’t anything special strait out of the blocks, but once you got on boost. Whoa, hold on to your seat. I always thought of diesels as slow. I was happy to be corrected.

But not all the people I met were car nuts. I had an old Homelite (Canadian made) chainsaw I bought on the side of the road shortly after getting our house. To use to cut a dead tree down in the backyard. It came with a parts saw and seemed to work well when I bought it. But by the time I got around to using it 6 months later, it was sitting in a pool of gas and wouldn’t start. I tried looking up what the problem might be and tried rebuilding the carburetor and a bunch of other things. But, to no avail.

As I was more interested in getting the tree cut down before the wind blew it onto my neighbours house. Than being a small 2-stroke engine mechanic. I just bought a small new chainsaw and got that job done.

I put the two old Homelite chainsaws on kijiji together for $60 figuring that someone might want them for parts or to fix. I posted the add Sunday night. By Monday morning, I had a buyer contact me and they were sold and gone that evening. A chainsaw nerd in Brantford saw the add and immediately got excited. The guys hobby was to collect and fix up old chainsaws. Who would have guessed such a person would exist. I felt like I should have asked more for them. As he didn’t even try to talk me down on price. But I’m not greedy and was happy to get the gassy smelling things out of my garage.

Not all my interactions with people from classified adds are that pleasant. Some people are rude and try to talk me down to next to nothing, some are brief and unmemorable (this is starting to sound like I’m talking about a different kind of classified add). But you have to take the bad with the good. It is an interesting and unique experience. And if you want to buy some 16″ steel rims from an Audi A4, let me know.

Don’t be friendly to your neighbours

This isn’t really a DIY post, just a funny experience that Lea and I had this past weekend. We had been talking about giving out neighbours some eggs sometime since we got our chickens in the late spring. It seemed like a nice neighbourly thing to do.

We have had a good amount of eggs since the chicks started laying in December and decided that Valentines Day would be a sweet day to give all of our neighbours whose yards touch ours (there are many) a dozen eggs.

On Saturday, we headed off with our bag of eggs to the three neighbours at the back and it seemed no one was home. We dropped a dozen off to our elderly neighbour next door who was quite grateful. Then returned home and decided to try our neighbours in the back again on Sunday.

On Sunday, we could see that our neighbour directly behind us was home. As they had a car in the driveway and the dryer vent was going. Though, when we knocked, no one answered the door.

We tried the next house where an old Italian couple lived. Lea had talked to them once before and promised them eggs sometime. I had never actually met them.

We rang the doorbell once…and nothing. Lea asked me. “Should we go?”

“Just try one more time”, I replied.

So, she rang the doorbell again and this time, I could hear some movement.

“Ah, good”, I thought.

But then a very angry looking old man answered the door and yelled at me to. “Go away!” With a thick Italian accent.

I was shocked by this greeting. Lea started to say, “we’re your neighbours”.

While I tried to go into our bag of eggs to pull out a dozen and tell him we brought eggs for them.

But before we had the chance, he yelled again. “What are you doing knocking on the door like that? Go away!” And he slammed the door.

Lea and I were both so shocked and offended that we didn’t even want to try the third neighbours house and returned to our quiet little house.

I am pretty sure that they thought we were solicitors of some sort. At least, that is my hope.

So, I guess the moral of the story is not to be nice to your neighbours.

Or maybe a nicer moral would be to drop by on your friends unexpectedly sometimes. Then maybe people wouldn’t always assume that when there is a strange knock at the door, it is someone trying to sell them something.

How to set timing (timing belt change) on a Subaru SOHC EJ25

How to set timing (timing belt change) on a Subaru SOHC EJ25

Timing is something that freaks people out when they do it for the first time. It’s like the first time for some other things, both scary and exciting at the same time. I know I was freaked out about it when I started work on my Subaru. But I found it quite strait forward once I got into it and hope my experience can help you out. It’s an important thing to learn, as they say, timing is everything.

When I read the Haynes repair manual, it made me think that setting the timing is super complicated and that I suck and won’t be good enough to do it. Not true, I did it and my car is still running great. I know you are good enough to set the timing on your Subie too! Thus, this is a pretty detailed post as I tried not to leave anything out. So, get cozy. Also, if you have any questions or want to make a comment. Please leave one at the bottom.

For those who aren’t familiar. The job of the timing belt is to position the valves correctly in relation to the pistons for intake of fuel and exhaust. So, when a timing belt is set in the incorrect position (or wears out), valves can be smashed by the pistons and severe engine damage occurs.

With most cars, timing is set to top dead center on number 1 piston. But on a Subaru with their funny horizontal boxer engine, it is set at mid-stroke. For those not familiar, I will explain what that means later. This DIY post will explain the most minimal way to access the timing belt for doing a timing belt change. If you are already taking the engine apart for something like a head gasket job, you can ignore the first part of this post.

These are the basic tools required for this job:

IMG_0106

1/2″ and 3/8″ ratchets, 10mm, 12mm, 14mm, 17mm and 22mm sockets, some long extensions, 14mm wrench, possibly some other wrenches, a whole socket and wrench set would be ideal. Just make sure you have a 22mm socket (my set doesn’t have one). You’ll also need a little pin (as pictured) or a small drill bit to hold the tensioner compressed, a breaker bar (possibly with an extending pipe for extra leverage, a strap wrench (or chain wrench would be better), a large phillips screw driver, flat head screw driver and some long bent needle nose come in pretty handy too.

You will also probably want some power tools. The harmonic balancer is torqued to 130 ft.lb. and breaking that bolt loose is the biggest pain in the ass of this job.

IMG_0107

A cordless impact wrench like the one in the middle is a very useful tool I would highly recommend for anyone doing much work on cars. I just got that wrench and wish I got it sooner. It won’t, however, bust off the harmonic balancer. That big bad Chicago Pneumatics air wrench will, but won’t fit in the space available in the engine bay. A butterfly wrench will, if you have one. An air ratchet is handy for taking off the tensioner for the a/c belt if you don’t have cordless impact wrench.

There are a few other tools that you might want to have, we’ll cover that when we get there.

This blog is based on my experience working on an 2004 Legacy Outback, I know this procedure would be exactly the same for many other years of Legacys, and probably the same or very similar for many years of Foresters and Imprezas with a EJ25 SOHC.

Let’s start taking your car apart!

I would recommend jacking up the front of the car and supporting it on jack stands.

Disconnect the negative terminal from the battery.

Remove the plastic splash shield underneath, 5 x 12mm bolts underneath and 2 x 10mm screws in the wheel wells.

For consistencies sake, I will refer to the left and right side of the car as if you were in the car, like most mechanics do, though I’m not a mechanic.

Get a bucket or drain pan under the cock at the bottom right of the radiator. Get your big phillips screw driver out and loosen that cock up (things are starting to get exciting already). Careful not to strip it, it is only plastic. Pull the cock out and drain your coolant.

While the coolant is draining, remove the ram air intake. A couple of 10mm bolts in the radiator support bar. I have a video on my Youtube channel which shows this in detail.

https://www.youtube.com/watch?v=zwy0SlmHTzg

Loosen the hose clamps on the radiator hoses and remove those too. You may have to wiggle and pry them a bit to get them loose.

Get under the car and unplug the two hose fans, push the tab up in the clips with a flat head screwdriver to loosen them.

If you have an automatic transmission, there is probably a transmission cooler down there too, that will need to have the hoses disconnected. My car’s a manual, so, not totally sure.

Double check that there isn’t anything connected to the radiator, then remove the two 12mm bolts holding the radiator to the support bracket. You can then lift the whole radiator out with the fans and bottle still attached. The bottom of the radiator is in a couple of rubber seats and might take a bit of pursuation to free from the car.

With that out of the way, you will have a lot more room to work.

Remove the drive belt covers. You remove a 10mm nut and bolt, then just loosen the bolt holding the alternator onto the a/c compressor. Leave it loose so the alternator can ‘hang loose dude’.

DSCN9765

Your engine will look something like this now. Except your power steering lines should still be attached. Label your drive belts with a paint marker, as illustrated, if you plan to reuse them.

Note: you can click on any of the pictures for a larger view.

Crank the tensioner bolt (14mm) beside the alternator so that the alternator drops down enough to remove the front drive belt.

Then loosen the locknut under the tensioner bolt for the a/c belt, loosen the bolt on the pulley, so it can slide. Then put a 14mm wrench on the bolt at the bottom of tensioner bolt and crank the bolt clockwise to loosen (it is reverse threaded).

Remove the belt once it is loose, then remove the two 14mm bolts from the block and the bracket itself.

Now you have easy access to the timing belt cover, hurray!

Except you still need to remove the harmonic balancer, that big effin pulley in the middle, boo!

Put your chain wrench with an old piece of belt to protect the pulley (or strap wrench) around the harmonic balancer.

Assuming you don’t have an impact wrench that will fit in there. Get your breaker bar out with the 22mm socket on it and start heaving. A ratchet with a hammer can work too. Either way, it is going to be a lot of work and you will be ready to give up at one point. But hang in there, it will eventually come loose.

Just be careful not to go too far over and break off the end of your coolant supply line. Because then you will curse and swear and have to weld it back on or replace the line.

After you get the harmonic balancer off and take a little break. Remove all of the hundred little 10mm bolts holding the timing belt cover off.

Then you will have a view something like this:

timing belt


Yes, success!

Now, here is the fun part. You need to set your timing! Basically, put your car in neutral (if it isn’t already) and get these two index marks to line up like this:

timing mark

If you car is like mine, there might be some dirt on the upper mark. Clean it off to locate it correctly. It isn’t quite strait up.

There are a couple of ways you can do this:

Put the harmonic balancer back on the crank sprocket with the 22mm bolt and crank the engine over (make sure it’s in neutral) with a ratchet.

Or, use two 17mm wrenches and crank over the two cam shaft sprockets simultaneously. A lot of mechanics wouldn’t recommend this. But it will work fine if you are careful and some people find it easier.

The camshaft sprockets should be inline with the index marks on the camshaft cover and marked on the block.

DSCN9793            DSCN9794


These two should actually be over to the right a little bit. The first photo of the whole engine has them in the right spot. But don’t worry too much about having these perfect. Just make sure the crank shaft sprocket is in the exact right spot.

DSCN9792

It is a good idea to mark the relationship between the index marks with your belt (cam sprockets too) and the direction of the belt. Even if you don’t plan to reuse your old belt. Because you can use it as a reference to make sure that everything is lined up correctly before putting the new belt on.

Also, this crank sprocket isn’t lined up correctly. Again why you need to clean that dirt off of the index mark above.

To remove the timing belt:

IMG_0091

First remove the little metal cover over the crankshaft sprocket (if applicable).

Then, one might think to first take the tensioner (blue pulley) off first. But DON’T DO THAT! That would throw too much tension out of the belt at once and throw off your timing, you so carefully set.

Instead, first remove the orange pulley (bottom left of photo), then the cogged pulley (or sprocket) beside the water pump, they are often coloured green, then remove the tensioner and the belt. You can leave the black pulley on unless you are replacing it.

Replacing the Timing Belt

In case you did pull the tensioner pulley off first and threw your timing off during removal. Or if you had the engine apart for another repair and need to move the crank over or valves, here are a few things to note so you don’t accidentally smash any valves.

If your crankshaft is at the index mark (or close to), you can freely move the cams around without coming anywhere near the pistons.

Or if you need to move the crank around and you think that some of the valves might be out, just turn the camshafts around until they feel loose, that means the valves are closed. But only do this if the crank is close to the index mark.

This will hopefully make sense when you are doing it. Put any questions in the comments below and I will try to answer them.

If you are reusing your tensioner, you will need to compress the piston in it with a vice or ‘c’ clamp, the place a pin or small drill bit in the hole to hold the piston down.

Once you have your crankshaft sprocket exactly at the index marks, replace the black pulley and tensioner bolt, torqued to 29 ft.lb. Leave the tensioner pin in place until the very last thing.

Line up the cam sprockets with the index marks above.

Wrap your old belt around to double check your marks line up.

If you didn’t do that step, wrap your new belt around the crankshaft sprocket under the tensioner and black pulley and over the camshafts. Careful not to move the crankshaft sprocket.

Working on one side at a time, create some tension on the belt, hold the belt in place on the crank sprocket with one hand, and wrap it over the cam sprocket getting the correct teeth in place so the index marks stay lined up. The teeth are pretty big, so, it will be pretty obvious when it is in the right spot.

Put a large black paper clip, spring clamp, or some clothes pins (whatever you have) around that belt on the sprocket to keep it in place.

Repeat the two previous steps on the other side.

Run the belt back over the water pump pulley and replace the green cogged sprocket beside it. Then the orange pulley last. Both torqued to 29 ft.lb.

IMG_0092

If you removed this little black plastic bit of the timing belt cover, make sure that you replace it before replacing the orange pulley.

When you have everything replaced and feel confident that it all lines up well. Pull the pin out of the tensioner and remove the clips holding the belt on the camshaft sprockets.

Before you get all excited and start putting the cover back on, bolt the harmonic balancer back on and crank the engine over a few times slowly to make sure everything is set properly. If you feel anything touching, STOP! That means something is out and you will need to correct it.

But if everything feels good and all the index marks keep lining up as they should. You did a good job. Now before you celebrate with a beer, you might want to finish the job and start the car up first.

The rest of the installation is basically the reverse of the removal. Don’t forget the little metal cover over the crankshaft sprocket.

If you haven’t done drive belts before. The general rule of thumb is to tighten them down until you have only 1/4″ (6.5mm) deflection.

That’s it. I hope that this helps out. For liabilities sake, I should say that I am not a professional mechanic and take no responsibility if you don’t set your timing correctly and wreck your engine. Which I am sure you won’t.

Good luck. -Scott

Our Chicken Saga Begins…

Finally a new post! I promise they will be more frequent. There have been lots of projects we have been working on over the summer. And I have remembered (sometimes) to take pictures.

This isn’t really a DIY post. More of a story of our adventures over this summer getting chickens for the first time. I have worked on a lot of farms with both laying hens and meat birds over the last few years. So, I am pretty familiar with looking after chickens. Though, this was our first time having chickens all on our own. Which has definitely had its challenges for us newbies.

We began our adventure in April of this year (2014). After reading a lot of different books and talking to friends with backyard poultry, we decided to buy some young female hens (pullets). Despite the warnings from many of the books. We thought this might be easier than setting up a brooder, etc. Plus, we would get eggs faster.

Most of the warnings from the poultry books warned that vendors at fairs were always getting rid of the birds they didn’t want. Runts, sick birds (without obvious conditions), birds from bad stock, inbred birds, etc. Would we luck out and still get good birds? Or….

So, one frosty Sunday morning in late April at the ungodly hour of 6:45am. We found ourselves in a red pickup truck on our way to the Fur and Feather Livestock Fair in Mount Forest, Ontario (an hour north of Guelph).

The weather was favourable for the event. It was beautiful and sunny out, though a bit cool to be standing outside for a long time. We had our friends Ellen and Saja in tow. They were interested in having chickens too. But didn’t have enough space at their house. We had a sort of boarding arrangement for chickens in mind at our house, this didn’t really work out in the end. But it was fun having them along for the adventure.

When we arrived at the fairgrounds in Mount Forest, we were surprised by the number of vehicles everywhere. Making for a bit of a walk to the fair. We noticed lots of people carrying pet carriers around to transport their birds in. We took note for the future. Not knowing quite what to use, we had just brought some crates lined with wood chips. These still would have worked fine. But most of the vendors also had cardboard boxes for them. It sounds a bit cruel, but keeping the birds in the dark actually calms them down. There were also people with carts to carry their new animals around with. This would have been an even better idea, as 5 little chickens get kind of heavy after carrying them around for an hour.

Mount Forest’s fairgrounds is quite large and it was packed with breeders selling all kinds of poultry birds: chickens, ducks, geese, peacocks, quail and more. Plus, larger livestock, like: goats, pigs, donkeys, and a few horses, sheep and puppies. It was a very noisy, busy and smelly, combined with a lack of sleep, made for a pretty surreal experience.

We had no idea where to start. So, we just wandered around in a daze looking at different vendors. After half an hour or so, we noticed some of the vendors were already selling out of pullets. We started to get nervous and bought a couple of birds from one vendor who seemed to have healthy looking pullets of some of the breeds we were looking for. They had 9 and 11 week old birds. We bought two Rhode Island Reds and one Plymouth Barred Rock. Ellen and Saja also bought a few hens from the same vendor.

After walking around and around the fair, we managed to find a couple more of the breeds we were looking for. A grey Wyandotte and a Gold Cochin. These were slightly more expensive birds, but I was happy to have some diversity in the flock. The birds ranged between $9 and $20 each, we spent a total of $64 on 5 birds. Ellen and Saja spent $56 on 3 Rhode Island Reds and 3 Columbian Rocks. Happy with our new feathered friends, we packed them safely in the truck and headed back to their new home.

We were lucky that our garage already had an insulated and vented room separate at the back of the garage. It was all painted and ready to go as a chicken coop. It just needed some perches, nesting boxes, feeder, waterer and a hole cut in the wall for a hinged window. Oh and a fenced in run coming off the back of that with some ramps on either side to get in and out. Easy right? Take a few hours…

lea chickenHere’s Lea enjoying watching our new chicks through the new window in the newly renovated coop. Unfortunately, because of the size of the room. It was impossible to get a photo of the whole inside of the coop.

flapping chickenHere’s Ellen with the flapping Columbian Rock and Saja releasing another of the Columbians. The nesting boxes are visible behind them. I have since added a little perch to help them get into the boxes. The hanging feeder is in front of Saja.  Beside them is a shelf with wood chips on it underneath the roosts. This makes it a lot easier to clean up their poop regularly each day. Which keeps the coop a lot cleaner with minimal effort. I got this idea from Hilltop Pastures, one of the farms where I apprenticed years ago.

We also had a galvanized gravity waterer, which was a very thoughtful house warming gift from friends, Bryan, Masako and Jamie.

We were too busy with the coop to prepare any of the run before the chicks arrived, I spent the next two weeks completing it (with help). I wanted to do the run right. As it would make the chickens more secure from predators and save me repairing it in the future. This mean, digging a two foot deep trench all the way around to bury the chicken wire and mounting cross supports along the top, to cover the run as well. The longest and most tedious part of this job was wiring together the multiple runs of chicken wire fencing. I bought 4 foot fencing, the tallest I could easily source, it still required multiple runs. The total area of the run was about 200 square feet.

DSCN9644First I staked out the area and dug the trench.

DSCN9645This jumps ahead a bit. Sorry, I forgot to take a lot of pictures. Here, the posts are in place. I used mostly t-bars, except for were the gate will go. I fastened wooden blocks to the tops of the t-bars, including one in the middle. Then I ran cedar 1″x2″s across for cross supports for the chicken wire going across the top.

DSCN9647This shot gives a bit better prospective of what’s going on.

DSCN9697 DSCN9701

Here’s an inside and outside shot of the finished run. It has a wooden gate I stole from another structure in my yard. You can kind of see how the top supports work. There is also a little roof over window and ramp area to keep rain from coming into the coop if the window is open. About 8 months in now and the run seems to working out well. No animals have broken in or chickens broken out.

The Challenges

In short, all of the books (not surprisingly) are right. Don’t buy chickens at fairs. Get chicks from registered breeders or small breeders that come recommended. It won’t be more work in the end because dealing with the issues from our fair birds has been a lot of work. It began with…

Very shortly after arriving at our place (just over a week) our grey Wyandotte began to show signs of sickness. Because of the timing, I am pretty sure that it was something that started before we purchased her. There are a number of things that it could be. Since we didn’t get a diagnosis from a vet, I won’t try to guess.

ladyWe separated her from the flock as soon as we saw these serious signs of illness: tail feathers down, head tucked in and drooping wings. We had her in a cage in our house with her own little waterer and feeder. This photo is actually about a week after we separated her, her wings weren’t drooping like that right away. We tried to nurse her back to health, by making special food mixtures with probiotics in them to help her digestion. We took her outside sometimes too. Where she seemed to be happier, but she would still hardly eat and drink. If this starts happening with one of your chickens, it usually means the end. Sadly in the case of Lady Grey, she died just over three weeks after we got her.

I wish this was the only heartbreak we suffered. A few days before Lady died, we noticed one of the Columbian Rocks had an enlarged crop. So big that it was dragging on the ground a bit. On top of that, she was eating like she was starving. Ellen and Saja took her into their house to try and look after her. After some research, we figured out that she had an impacted crop. This means that her crop wasn’t functioning properly. So, it was getting filled with food that wasn’t going anywhere. Hence why she kept eating, as she must have felt really hungry. An impacted crop is usually caused by a sour crop, which is usually caused by a chicken eating something (like twine) that clogs up their crop and won’t break down. It can also be hereditary. Since she had been restricted to the coop with a diet of only feed, it was more likely the latter. Again beware of fairs. When one of the other Columbian Rocks showed signs of an impacted crop. We were pretty sure that was the problem. Another reason to be wary of buying chickens from fairs.

Unfortunately, there isn’t much that can be done about an impacted crop. It is possible to put a crop bra on the hens and give them a special easy to digest diet. But that is a lot of trouble for most people. Without those measures, they will probably starve to death. They can however, be eaten as an impacted crop isn’t caused by a disease.

As the Columbians were still Saja and Ellen hens at this point. They decided to bring them to a chicken sanctuary where someone there offered to give them special attention. Probably not the decision I would have made, but a very nice one.

After having problems with our hens and being short 3 hens from our original 11, we decided to order some day old chicks from the local feed store for pickup in mid-June.

We’ll save that story and more of our chicken adventures for the next instalment in our saga…


Creating a composter out of old skids

Here’s a simple and quick way to make a composter out of old skids. This took me about one hour to complete. Not including picking up the skids and other materials. The first step is to steal some skids from an unsuspecting victim. DSCN9587 Ideally, you would have access to a pickup truck to move the skids. Comme ca:

305930_136692649793271_1671791584_nPreferably an antique with a big engine to outrun your victims. Failing that, any pickup truck will do. If you can’t source a truck, roof racks on a car will work too. But you might need to do it in two trips. You will need 5 skids in total.

Some kind of large flat bed bike trailer might also be an option. Though, that will probably be even more limiting to the number of skids you can move. Again, you need 5 skids. Count ’em 5 (one is buried in snow).

DSCN9567Now leave them outside for awhile and let them get covered in snow and frozen to the ground.

Or if you are smarter than me, you will make the composter in warmer weather. For this job, you will also need some tools (I will describe later) and to buy a couple more things. Most importantly, some wire. I would recommend 14 gauge galvanized fencing wire, one roll is plenty. This is strong, easy to work with and won’t rust. You will also need some chicken wire, a 25 foot roll will be more than enough. If you want to really make this composter for nothing, you could use old coat hanger wire. Easy to get for free from a dry cleaner. And omit the chicken wire. Though, I wouldn’t recommend that. The coat hanger wire is going to be a lot harder to work with. It will rust after a couple of years (even if it is painted). And more of the food scraps will fall out of the sides. Now that you have all of your materials. The first step is to scrape the snow and ice off of the skids. DSCN9568 Hopefully, you are smarter than me and are doing this job in beautiful warm weather. If so, omit this step. You may also need a pry bar to loosen the bottom skid out of the snow. Particularly, if you broke your old rusty shovel which you tried to use first. A garage is pretty necessary for doing the next few steps if the weather isn’t agreeable. Get your skids set up in the garage or in the glory of the great outdoors. DSCN9569 You will want them all with the top side (the one with the slats closer together) up. Get your tools ready.

DSCN9570You will need a staple gun, tin snips, wire cutters, 14 gauge galvanized wire, 5/16″ staples (a bit bigger staples are fine too), and a flat head screw driver to pull out your inevitable mistakes.

Get your chicken wire out. DSCN9571 Fortunately, standard chicken wire is the same width as a skid (or close enough).

DSCN95731. Staple the end of the chicken wire roll into the first board of your first skid. Evenly tack 5 staples in the first board.

2. Roll the chicken wire out to the other end and staple it down to the last board with 5 staples too.

DSCN95743. Cut the chicken wire flush with the end of the skid.

4. Staple the top and bottom of the chicken wire to each remaining board on the skid then put a couple more in between the ends of each board. Repeat steps 1-4 for the next 4 skids. You could add more staples, if you like. The compost will push the wire into the compost bin walls. But the staples will hold the chicken wire up against animals from outside. So, I recommend more staples if you are concerned about animals. The chicken wire won’t keep out mice. Squirrels will probably find some spot to make it through too. It should hold off racoons. Staples won’t hold into ice, try to avoid the ice on the skids. Better yet, avoid doing this in the winter!

DSCN9575Beautiful isn’t it? Now you are almost ready to assemble the composter.

DSCN9576Put down some old newspaper or cardboard on the ground under where the composter will be. If it is windy (like it was for me), have some compost or dirt handy to weigh down the paper and keep it from blowing into your neighbours yard. This will help to keep weeds from growing into the compost and they will be all decomposed by the time the compost is too.

If you aren’t concerned about weeds growing in, you can leave this step out.

DSCN9577Loosely set up the skids in position. If the ground is flat, they will sit up on their own.

I prefer to arrange the skids with the boards positioned vertically. I feel like the compost gets better aeration and the look more aesthetically pleasing. It isn’t a very beautiful thing either way. This should be considered when locating the composter.

DSCN9578The corners should overlap each other like so. There will be a gap on either side of the lid. A couple of old 2x4s or 2x6s screwed into the side will close most of that.

DSCN9581Wrap wire around near the top and bottom of each corner. I recommend leaving lots of excess to twist the wire tight. This will make it a lot easier to take the bin apart when you want to clean the rich finished compost out.

DSCN9583Attach the lid along the top of the back skid in the same manner as the corners. I recommend choosing the best skid for the lid skid. It will both be nicer to look at when you are adding compost and hold up better to the extra abuse.

DSCN9584Finished just before sundown. Ready to fill up.

It is a good idea to add some topsoil or finished compost in at the bottom of the composter and periodically as you add more food and garden scraps. This will add extra microbes which will greatly aid in the composting. Periodically adding some leaves (NOT black walnut) or straw along the way will also be beneficial to the decomposition process. It may not be the classiest thing in my yard. But the garden sure will be classy with all of those good nutrients!